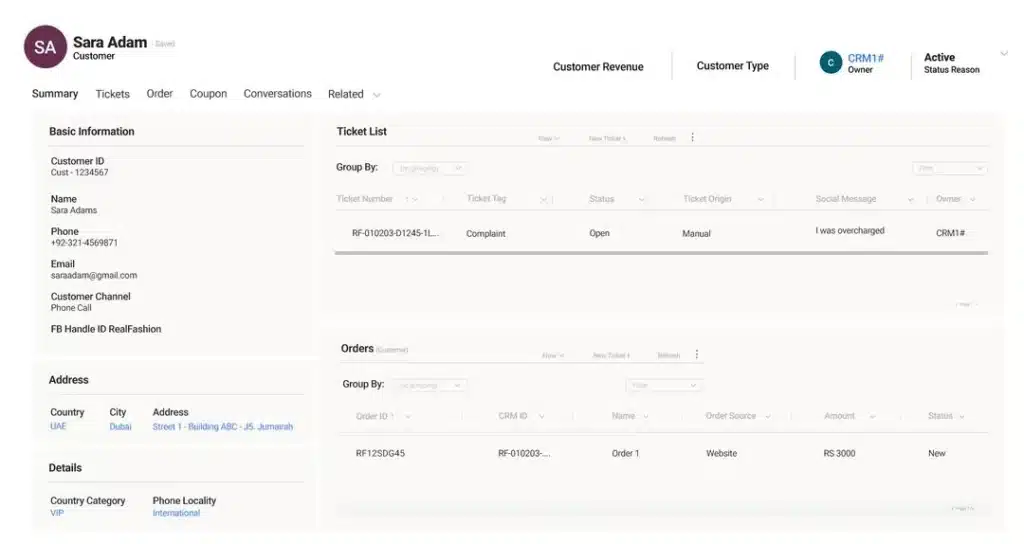
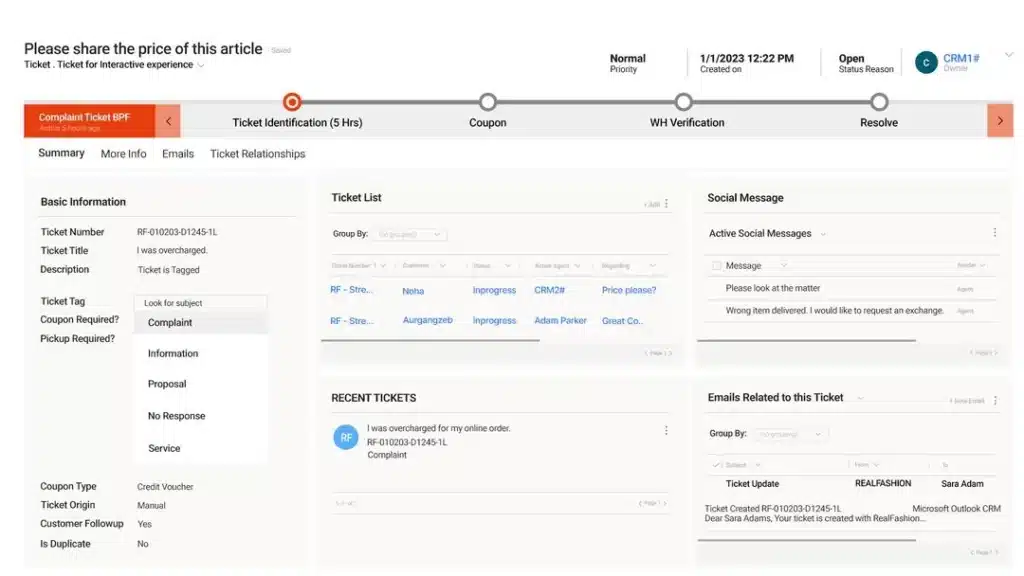
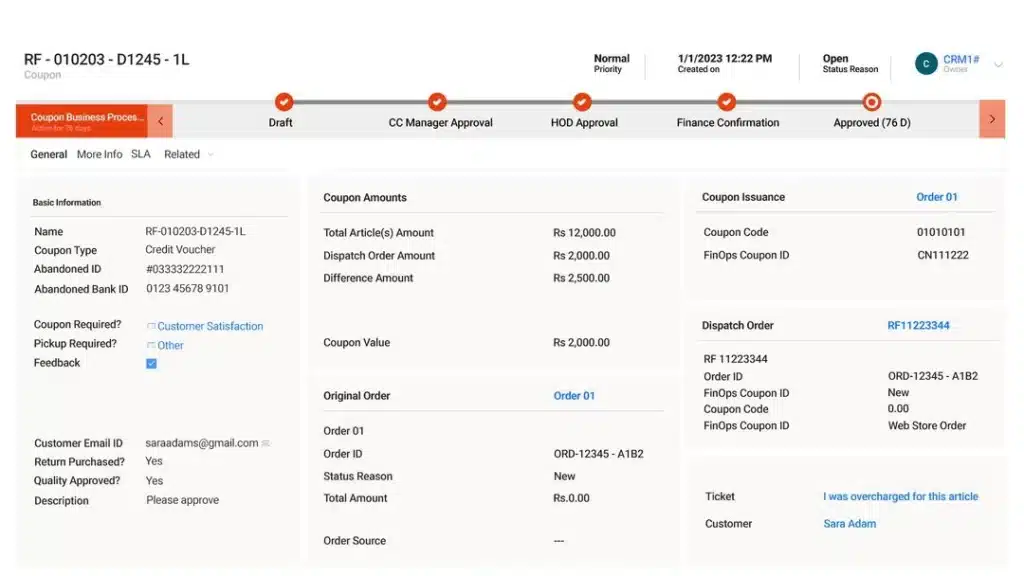
Increase agents' productivity by streamlining and automating your customer service operations. Enhance CSR's case and knowledge management with a 360-degree view of their customers.
Drive Customer Satisfaction
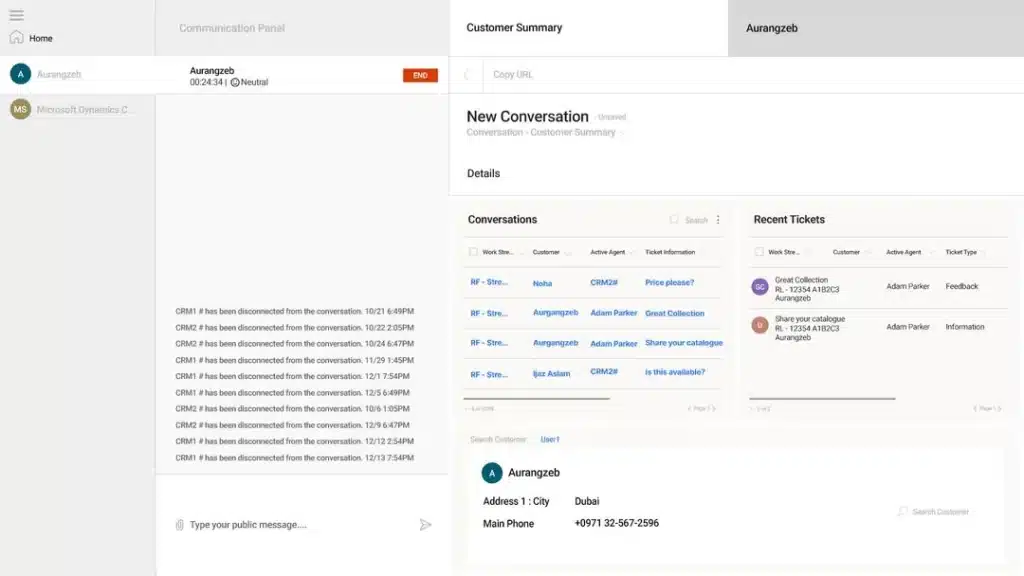
Improve your brand experience and customer satisfaction scores by implementing an omnichannel support model. Ensure quick inquiry resolution through a digital-first customer support system.
Ensure Performance Visibility
Track the performance of your agents, measure CSAT, and identify bottlenecks through built-in dashboards and reports.
Accelerate Business Growth
Have a laser-sharp focus on customer retention and foster brand loyalty by delivering excellent customer experiences. You will witness your business grow naturally!
The need for omnichannel customer service is greater than ever!
Are you prepared to meet your customers where they are?
Today, the way users interact with brands is evolving remarkably with continual changes in technology and the proliferation of channels. Switching between multiple devices and touchpoints is the new trend. Customers want to be able to interact instantly with a brand online, via mobile and in the physical store. All with an expectation of consistent customer service across channels. Moreover, around 89% of customers in today’s fast-paced world expect prompt response and query resolution regardless of the channel they use to contact a support team.
Omnichannel customer support is the way forward!
This drastic shift in customers’ preferences and behavior has given birth to the concept of omnichannel customer service, which seamlessly integrates customer communications across all channels, both online and offline, into one single source of truth. This allows businesses to empower their agents to provide personalized support, increase customer satisfaction, and deliver a consistent customer experience.
185+
Dynamics 365
Consultants
18+
Years of experience
in Retail
100+
Satisfied global
Customers for Dynamics
World Offices
Presence in the US,
Middle East & Pakistan
Our Key Capabilities
A single interface to deliver frictionless customer support